April 6, 2011

A Thank you cake

Hate saying goodbye so I choose to say thank you instead :) Today I had my last lecture with a very small but very nice group of 4 students. We had so much fun together, at least I hope they also had fun and that they learned. 
Last week I tried a lovely sour cream pound cake recipe. Even though I searched for a new inspiration this week, I turned to the one I already tried in the end. To make it new, I went for blueberries and lemon this time. My lovely mum picked some most wonderful blueberries last summer for me. Just look at the size of those! No wonder I'm always having a hard time deciding how to use them. I usually take a spoonful or two with a bowl of yoghurt or oatmeal in the morning but that's about it. I tend not to "waste" them to baking but today they were totally worth the "waste"! Who wouldn't like a moist, lemony cake with the precious blueberries? I think I can tell that the cake was appreciated! :)

Blueberry&lemon sour cream pound cake


Ingredients:
100 g butter softened
1 cup caster sugar
2 teaspoons vanilla sugar or 1/2 teaspoon vanilla extract
3 eggs
2 dl sour cream
zest and juice of 1 lemon
1 1/2 cups plain flour
1/4 teaspoon baking powder
1 teaspoon baking soda
about 1 1/2 cup blueberries (fresh or frozen) + 1 tablespoon plain flour

Method:
1. Store the eggs, sour cream and butter at the room temperature for about 30 minutes before you start.
2. Set oven to 175 degrees. Grease and flour a high rectangular cake mold.
3. You can soften the butter a little by using a microwave oven.
4. Beat the butter and add sugar, beat again until fluffy and smooth.
5. Beat in eggs, one by one. Mix in the zest and juice of 1 lemon.
6. Mix in the mixture of flour, baking soda and baking powder alternately with the sour cream.
7. Put the frozen or fresh blueberries in a bowl together with the tablespoon of flour. Toss the bowl so that the blueberries are evenly floured. This procedure is to prevent the fruit from sinking to the bottom of the cake.
8. Gently mix the blueberries into the dough. Transfer into the cake mold and bake for about 45-50 minutes.

I wish I had baked the cake a little bit longer, but I was in a hurry and when the cake was just done, it had to get out from the oven..Next time it'll be just perfect! :)

April 1, 2011

Muffins with toffee topping for sweet addicts

 
I know exactly how these muffins with toffee topping happened to me. Some time ago I discovered a wondeful thing at our local food store. Toffee muffins. They were so extraordinary delicious that I've been thinking ever since how to make them at home. Especially after they vanished from the market completely.
The result is not an exact copy of those from the food store, but they are very dreamy :))
And now I can officially call myself a sweet addict-again. I'll be enjoying this status for a few more days before cutting down on sugar.
The recipe is a combination of two. I decided to make the muffins of a sour cream pound cake dough which turned out really great. As for the toffee sauce, I found the most wonderful Nigella-recipe.

Sour cream pound cake muffins with Nigellas sticky toffee topping

Inspiration: http://www.nigella.com/recipes/view/sticky-toffee-muffins-1916
http://vondelicious.blogspot.com/2010/09/perhaps-my-favourite-cake.html
 Ingredients:
Muffins:
90 g butter
(almost) 1 cup sugar
3 eggs
2 dl sour cream
1 1/2 cups plain flour
1/4 teaspoon baking powder
1 teaspoon baking soda
a pinch of vanilla bean extract or 1 tbsp vanilla sugar

Toffee sauce:
60 g butter
75 g light muscovado sugar
1 tbsp golden syrup
125 ml double cream

Method:
1. Let the sour cream, eggs, and butter at a room temperature for about 30 minutes.
2. Set oven to 180 degrees.
3. Beat the butter for about 30 seconds. Gradually add sugar and beat until light and fluffy for about 10 minutes.
4. Mix together flour, baking soda, baking powder and vanilla/vanilla sugar.
5. Beat in eggs into the butter-sugar mixture, one at a time.
6. Alternately add the flour mixture and sour cream until well combined.
7. Fill the muffin cups with the mixture to 2/3 and bake for about 20 minutes. Let cool completely. 
8. Meanwhile, put the butter, muscovado sugar, golden syrup and cream in a pan over a low heat. 
9. Stir to combine, then increase the heat and simmer for 10 mins until thickened.
10. Remove from the heat and cool to room temperature. 
For serving, drizzle the muffins with the toffee sauce or groop a hole in each muffin to fill it with the toffee sauce..

March 27, 2011

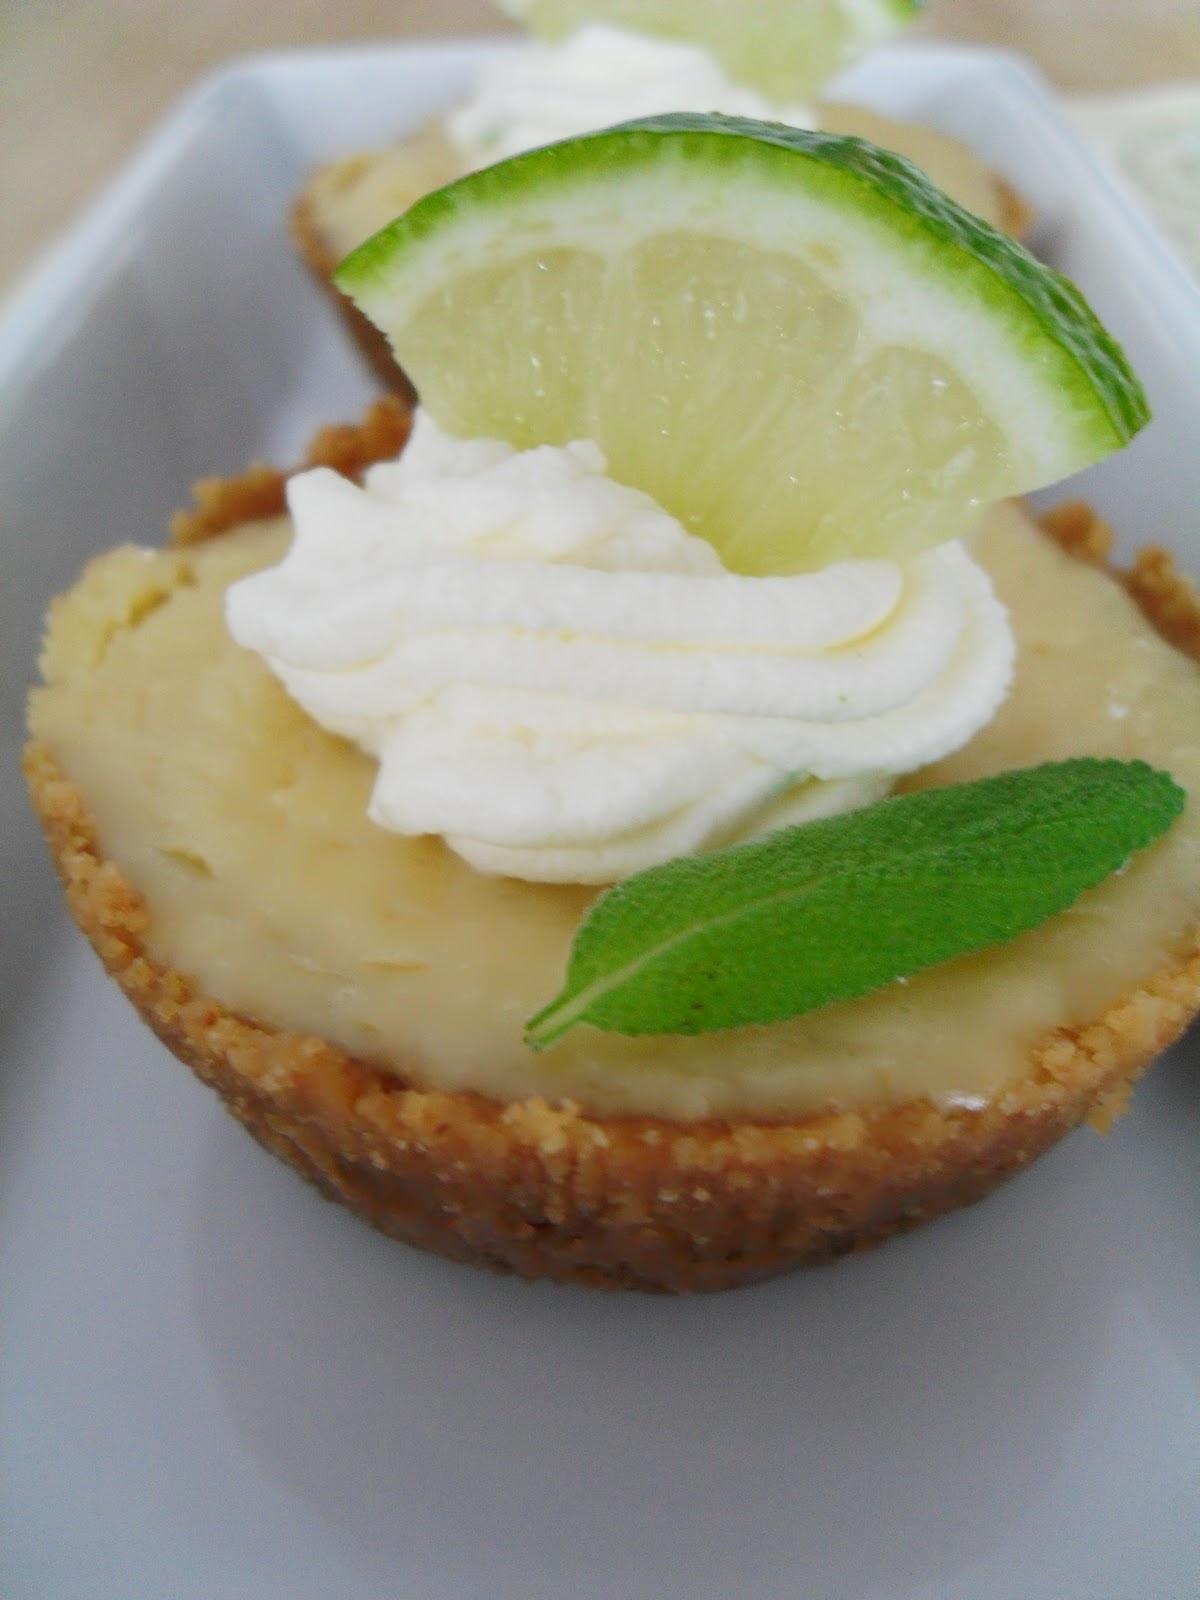
Lovely individual lime pies

We had a family gathering today. Preparing dinner for 6 people went just fine once I made my mind up about what to make. When the table was set, I had totally forgotten to photograph but I think I made a nice meal and everyone seemed to like it. We had roasted chicken breasts, fresh fettuccine with salvia and lemon-lime dressing, sallad, fried sugar peas and cold avocado-lime-sour cream sauce. Yummie :)
For dessert I made these tiny lime pies. I just love individual desserts when I can slip cutting and measuring so that each portion looks the same..You have certainly heard of a Key Lime Pie dessert. One of my absolute favorites! I have made it before but this was the first time I sieved the filling to get a rid of the lime zest. I couldn't make a better decision! The filling came out so smooth in both texture and flavor. Highly recommended!

Individual lime pies


Ingredients: (makes about 16 small sized pies)
about 180 g Digestives
100 g butter
1 tea spoon dried ginger
small aluminium cups
1 can sweetened condensed milk
juice and zest of 3 limes
3 egg yolks
(whipping cream and lime+zest for decorating)

Method:
1. Set the oven to 180 degrees.
2. Mix the crushed Digestives and the ginger spice with the melted butter. Line the aluminium cups with the mixture, just like when making a pie crust. Bake for 10 minutes, remove from the oven and let cool.
3. Mix the sweetened condesed milk with the juice and zest of 3 limes. Add the egg yolks and mix until it comes together.
4. Let the mixture drag the lime flavor for about 30 to 60 minutes. Seive and toss the lime zest.
5. Fill the prebaked crusts with the lime filling and baked for about 15 to 20 minutes. The baking time depends on the size of the pies.
6. Let cool completely, preferably in the fridge.
7. Before serving, remove the aluminium cups carefully. Serve with a whipping cream flavored with lime zest.


March 19, 2011

Pearspotting :)

 
Pears, pears and more pears. These last few days I've been hooked on pears, you might have noticed :) I know, it's so not their season this time a year but..It started when I was making oven baked root vegetables. I thought that it wouldn't hurt mixing pears with carrots, parsnips, potatoes and red onions. And yesterday. Avocado&pear kidney bean salsa for lunch. Today I was searching for a pear dessert recipe and found loads of them that I plan to try. The first one makes itself in the oven, just what I need when I'm preparing for an exam.

Baked pear with cinnamon&ginger butter


Ingredients: (2 servings)
1 pear (I used Conference)
1 tbsp butter
1 tsp ground cinnamon
1 tsp ginger spice
1 tbsp muscovado sugar
 tin foil
 hasselnuts (or almonds, walnuts, pecans..)

Method:
1. Preheat oven to 180 degrees.
2. Cut the pear diagonally and remove the core, leaving a scoop in the middle.
3. Mix together butter, sugar and spices. Spoon the mixture in the scoop.
4. Place each pear half on a separate square of tin foil, scooped side up, and wrap so that it does not leave any opening.
5. Bake for about 45 minutes.

Spiced butter together with sugar and pear juice make a wonderful syrup. Serve with toasted nuts and creme fraiche or vanilla ice cream.

March 18, 2011

Catchin' up..

Gosh, it's been a busy week and went by fast like hell! I didn't have a spare moment to spend with my blog so now I'm catching up. Amazing things have happened in the food blogger world this week. The best Slovak food bloggers I'm following have made some seriously wonderful stuff in their kitchens that made me wanna Cook, eat and photograph :), they made me wanna enjoy!
I'm having a day off which means that the kitchen is full of me! Why should I bother making plans for cooking when my first (or second?) thought after waking up is that I'd fancy a fruity "sponge cake" (bublanina). Having thoughts like this is not unusual for me but they usually attack my brain when I'm fully awake.
Bublanina is a very easy made and very common Slovak dessert. When I'm thinking "bublanina" I recall a hot summer day at my grandad's garden with an odour of fresh rape fruits like apricots or peaches in the air. I made just a couple of bublaninas over the last few years so maybe that's why my craving for making one today was so intense..

Bublanina with pears and raspberries


Ingredients:
2 eggs
1 cup caster sugar
1 tbsp vanilla sugar
lemon zest of a half lemon
0, 75 dl milk
0,75 dl canola oil
1 1/4 cup all purpose flour
2 tbsp baking powder
1 pear and a half a cup raspberries (frozen or fresh)

Method:
Preheat oven to 180 degrees.
Beat the eggs and sugar until fluffy. Add milk, oil and lemon zest. Stir in flour and baking powder, pour it in a medium oven ware dish. Clean the pear and cut into pieces. Powder the fruit with a little bit of flour in case you don't want it to sink on the bottom of the cake while baking (I didn't do this and look what happened :)). Place the fruit randomly on the cake dough and bake until the top is golden brown, for about 25-30 minutes. Check after 20 minutes, the baking time very much depends on the oven type, dish depth, dough etc..

 
Lunching for me is almost always a spontanious thing. All I knew today was that I'd make something of avocado. I had my favorite avocado soup earlier this week so I was gonna let my imagination go a bit further this time. The result was decent and took only 5 minutes to accomplish. Having a spare pear that I didn't use when baking, I'd decided that I'd put these two lovely fruits together. Tada, they totally match! Kidney beans made the "avocado-pear marriage" a legitimate lunch material :)

Avocado&pear kidney bean salsa

Cut the fruit of avocado and pear, mix in a bowl, add lime juice, a little bit of sea salt and kidney beans of a good quality.  

Enjoy!

March 11, 2011

White chocolate and vanilla bean panna cotta with mashed raspberries

After what seems like ages, it's panna cotta time! I couldn't resist the temptation of making one as I was salivating through the latest Daring Bakers' challenge on Tastespotting.
This panna cotta is my favorite for two reasons: 1. No added sugar and 2. (rasp)Berries!
I'm stuck in the heavenly combination of white chocolate dissolved in heavy cream and topped with the freshness of juicy raspberries.
I only dare to make this dessert either on special occassions or when i know that there is a chance for hours of sweating at the gym! And never more often than once-twice a year :)) It's highly addictive!

White chocolate and vanilla bean panna cotta with mashed raspberries

Ingredients: (2 servings)
2,5 dl heavy cream
50 g white chocolate
2 gelatine sheets
a pinch of vanilla bean powder
about 100-150 g raspberries
(sugar)

Method:
1. Put the gelatine sheets in a cold water and let them soak for about 10 minutes.
2. Heat up the heavy cream and remove from the heat when it starts simmering (do not cook).
3. Squeeze water out of the sheets of gelatine and stir so that it dissolves in the heavy cream.
4. Add the chopped white chocolate and stir until melted and smooth. Add vanilla bean powder (and some sugar if you like).
5. Pour into a serving bowles and refrigirate for about 4 hours.
6. Before serving, mash the raspberries and spoon them on the top of the panna cotta.

March 6, 2011

Sheep cheese crostini

Small, tasteful toasts. No wonder that there are a zillion recipes on crostinis, they simply have the potential.
I can never find the Slovak product of sheep cheese called "bryndza" here but I shouldn't complain, a Greek sheep cheese is always available. I'm so longing for a plate of bryndzove halusky, Slovak traditional dish, but I know I can forget about it until I'm reunited with my family in Slovakia. Or, I can make friends with the Greek sheep cheese instead :)

 Sheep cheese&cherry tomatoes crostini


Ingredients:
baguette
olive oil
(crushed garlic)
cherry tomatoes
dried basil or oregano
sheep cheese

Method:
1. Preheat the oven to 200 degrees. Choose the same program you use for making pizza.
2. Slice the baguette. Place on a baking sheet.
3. Brush the crostinis with olive oil and a little bit of chrushed garlic.
4. Cut the cherry tomatoes and place on the bread. Sprinkle some basil or oregano on the tomatoes.
5. Top with the sheep cheese and bake for about 6 minutes, until the crostinis are lightly brown. Cool before serving.

My time for cooking (and other pleasant things) has shrunk drastically but I still have to and want to cook. More than ever I'm looking for easy and quick solutions (that are not dull). Thanks to my food blogger friends I'm never left with a dilemma about "what to cook". It's actually more about "what to cook first??" So today I chose to try this recipe. I can totally recommend, if you like surprising tastes. We do!:)